Step 1: Create a New Application and Projects
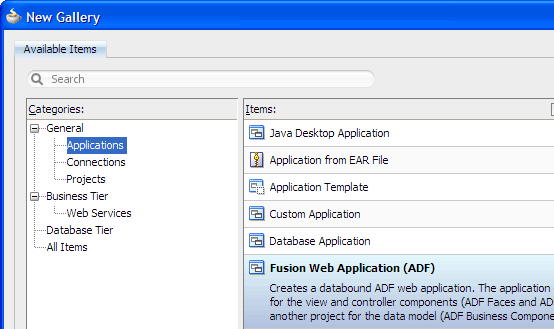
- From the main menu, choose File > New. In the New
Gallery, expand the General category and select Applications.
Then in the Items list, select Fusion Web Application (ADF) and click OK.
- To follow along with the example, enter
MenuWebAppas the application name.
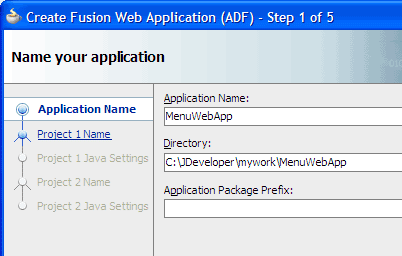
- Accept the defaults and click Finish.
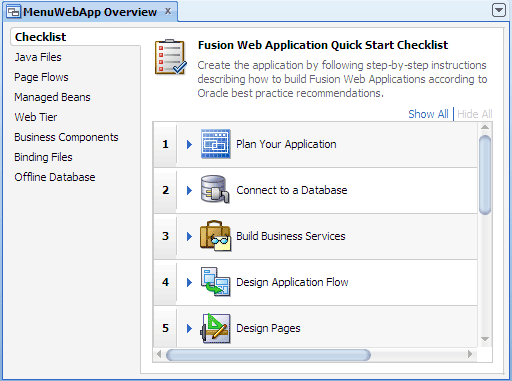
The Application Overview window opens by default in the editor window area when you create a new application. You can optionally close the window, since you will not be using it to create objects for this application.
The new application created from the template appears in the Application Navigator already partitioned into tiered projects, with the associated features set in each project. The Projects panel in the Application Navigator should look like this:
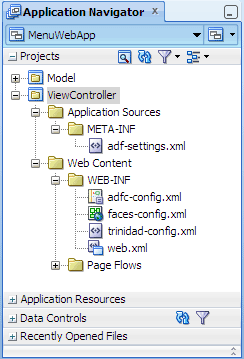
Projects are displayed as the top level in the hierarchy in the Application Navigator. The Fusion Web Application (ADF) template that you used for your web application partitions your application into two projects: Model and ViewController.
In the Application Navigator you can collapse and expand any panel. You adjust the size of panels by dragging the splitter between two panels. To group and sort items in the Projects panel, use the
JDeveloper has the capability of recognizing many different file types, displaying each in its appropriate viewer or editor when you double-click the file in the Application Navigator. Closing an application or project closes all open editors or viewers for files in that application or project and unloads the files from memory.
Note: Nodes in italics in the Application Navigator mean that the elements have not yet been saved. A project node is bold when a file in the project is selected.
Step 2: Create an Unbounded Task Flow for Each Menu
-
To be able to follow the steps exactly as written, enter values as shown in the instructions throughout the tutorial.
But first, read the information below to learn about the page hierarchy you're going to use in the example.
-
In the Application Navigator, right-click the ViewController project and
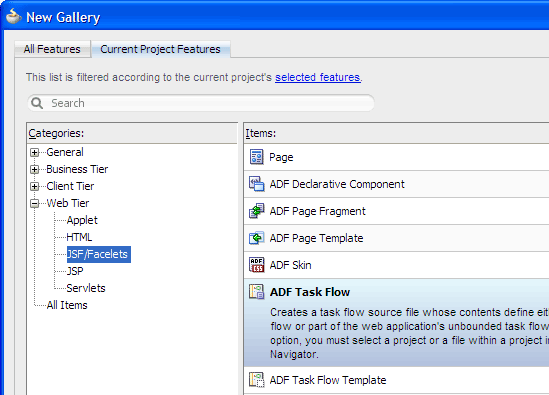
choose New > Web Tier > JSF/Facelets > ADF Task Flow, then click OK.
- In the File Name field, enter
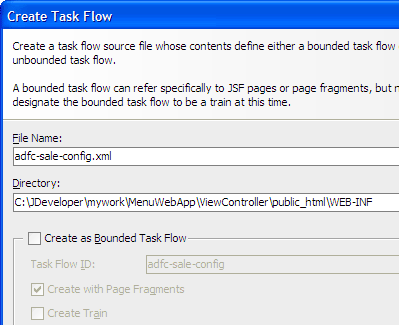
adfc-sale-config.xmlfor the unbounded task flow that represents the Sale menu. Deselect Create as Bounded Task Flow, then click OK.
- In the Application Navigator, right-click the ViewController project again and
choose New > Web Tier > JSF/Facelets > ADF Task Flow, then click OK.
- In the File Name field, enter
adfc-products-config.xmlfor the unbounded task flow that represents the Products menu. Deselect Create as Bounded Task Flow, then click OK. - In the editor window, click the document tab adfc-sale-config.xml to bring the Sale unbounded task flow diagram forward.
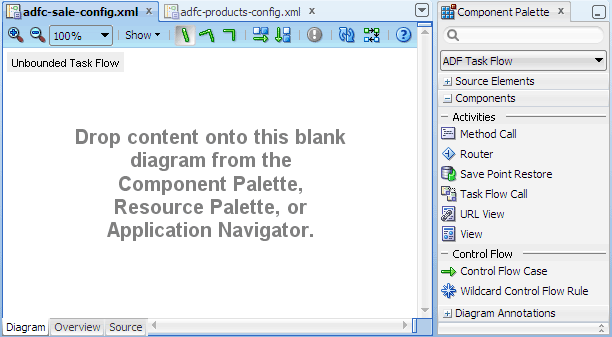
- In the Component Palette, ADF Task Flow page, Components
panel, drag and drop
 View
on the diagram, then rename the view activity. Do this four times,
using the following view activity names for the pages in the Sale menu:
sale
electronics
office
media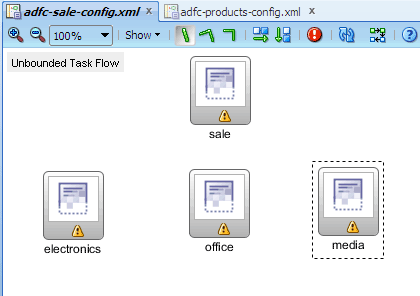
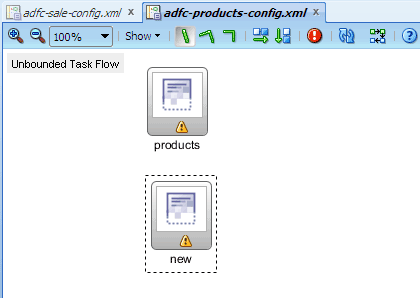
- In the editor window, click the document tab adfc-products-config.xml to bring the Products diagram forward.
- In the Component Palette, ADF Task Flow page, Components panel,
drag and drop
 View
on the diagram, then rename the view activity. Do this two times,
using the following view activity names for the pages in the Products
menu:
products
new
- In the Application Navigator, double-click adfc-config.xml to open it in the diagrammer.
- In the Component Palette, ADF Task Flow page, Components
panel, drag and drop
 View
on the diagram, then rename the view activity. Do this four times, using the following view activity names for the pages:
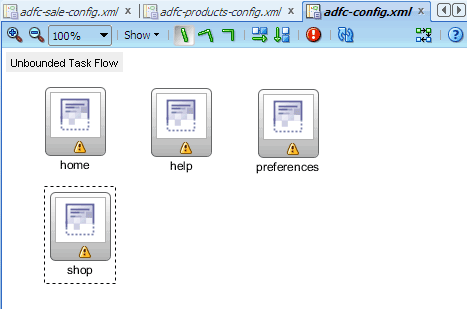
home
help
preferences
shop
- Click
 Save All to save your work.
The diagrammer for the default or rootadfc-config.xmlshould look like this:
For example, the illustration below shows a page hierarchy with three levels of nodes under the top-level node, Home. The top-level node represents the root parent page; below the root node are first-level nodes, Products and Shop; below the first-level nodes are second-level nodes, New and Sale and the third-level nodes are Electronics, Media and Office.
Each node in a page hierarchy corresponds to a page in the application, and each node (except the root Home node) can be a parent and a child node at the same time. For example, the first-level node Products is a parent page that contains general information for the second-level child nodes New and Sale. The second-level node Sale is also a parent node that contains general information for the third-level child nodes Electronics, Media and Office.
Navigation in a page hierarchy follows the parent-child nodes. For example, to access the Electronics page from the Home page, the end user would first navigate to Products, then to Sale. The path of selected nodes or links starting from Home and ending at Electronics is known as the focus path in the tree.
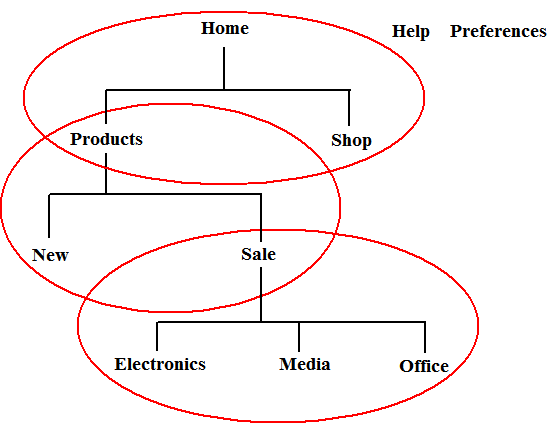
Some cross-level or cross-parent navigation may also be possible in a page hierarchy. For example, from the Electronics page, end users can jump to the New page on the second level, and to the Products or Shop page on the first level.
The Help and Preferences nodes, which are on the same level as the root Home node but are not linked to any other node in the hierarchy, are global nodes. Global nodes represent pages that can be accessed from any page in the hierarchy.
An efficient method of creating a navigation menu system for a page hierarchy is to use a menu model. ADF menus use ADF Controller features in conjunction with the XML menu model to build the navigation menus associated with the page hierarchy.
In the page hierarchy shown above, a menu consists of a parent node and its child nodes, as indicated by the red outlines on the illustration. So in the tutorial you will create three menus: Home, Products, and Sale. The root or Home menu has two menu items: Products and Shop; the Products menu has two menu items: New and Sale; the Sale menu has three menu items: Electronics, Media, and Office.
The source file for an unbounded task flow is written in XML. Each source file must have a unique file name.
Use the format
adfc-xxx-config.xml for the file name, where xxx is the name of a menu (for example, adfc-sale-config.xml).
Using the prefix adfc for all of your source file names for the unbounded task flows helps to identify them as unbounded
task flow sources (as opposed to bounded task flow definitions).
Do not use the file name
adfc-config.xml for a menu other than the root or Home menu. adfc-config.xml is the
default unbounded task flow automatically created for you by JDeveloper when you created the application using the
Fusion Web Application (ADF) template. adfc-config.xml will become the application's root menu that will include the
other menus in the application.
Step 3: Create an ADF Menu for Each Unbounded Task Flow
-
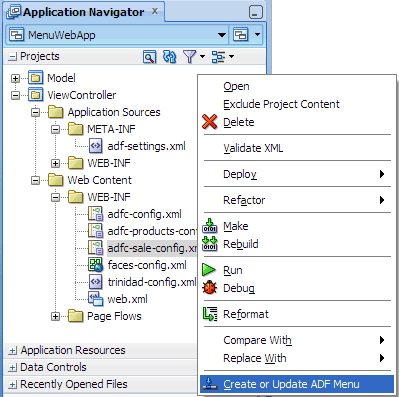
Starting with the lowest menu in the hierarchy, in the Application Navigator
right-click adfc-sale-config.xml and
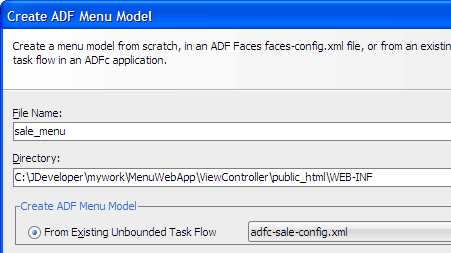
choose Create or Update ADF Menu Model from the context menu.
- Enter
sale_menuas the menu metadata file name in the File Name field.
-
Accept the default values and click OK.
-
In the Application Navigator, right-click adfc-products-config.xml and choose
Create or Update ADF Menu Model. Enter
products_menuas the menu metadata file name and click OK.
You should see the structure ofproducts_menu.xmlin the Structure window.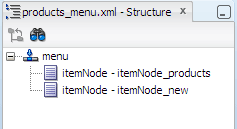
-
In the Application Navigator, right-click adfc-config.xml and
choose Create or Update ADF Menu Model. Accept the default menu metadata file
name (
root_menu) and click OK.
- In the Application Navigator, select the menu metadata file sale_menu.xml.
The structure ofsale_menu.xmlshould be displayed in the Structure window.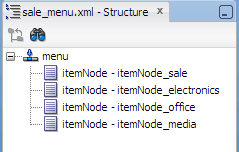
-
In the Structure window, select each item node and then change the Label attribute value in the
Property Inspector. Use the following values for the item labels:
Sale
Electronics
Office
Media -
In the Application Navigator, select products_menu.xml. In the
Structure window, select each item node and then change the Label value in the Property
Inspector. Use the following values for the item labels:
Products
New -
In the Application Navigator, select root_menu.xml. In the Structure window,
select each item node and then change the Label value in the Property Inspector.
Use the following values for the item labels:
Home
Help
Preferences
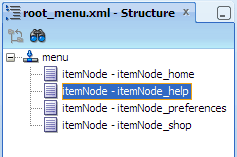
Shop - In the Application Navigator, select root_menu.xml again. In the Structure window, select
itemNode - itemNode_help.
-
In the Property Inspector, enter
http://www.oracle.comin the Destination field and press Enter.
- Click
 Save All to save your work.
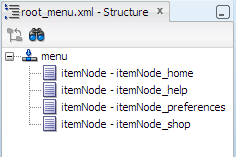
The root ADF menu model, which is a representation of the root or Home menu in the page hierarchy written in XML format,
looks like this in the Structure window:

Step 4: Create a Hierarchy of Parent and Child Nodes in Each ADF Menu
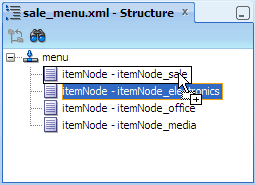
- In the Application Navigator, select sale_menu.xml. In the Structure window,
using itemNode_sale as the parent node, drag and drop the following item nodes
into itemNode_sale, one at a time:
itemNode_electronics
itemNode_office
itemNode_media.
- In the Structure window of
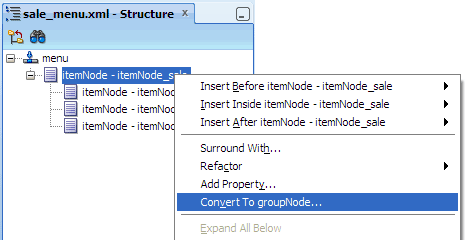
sale_menu.xml, right-click the parent node itemNode_sale. Choose Convert to groupNode from the context menu.
- In the groupNode Properties dialog, accept the default id value, which is required.
Click
 at the end of
the idref field. Select the first item node, itemNode_electronics.
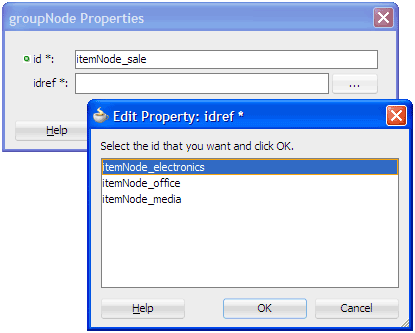
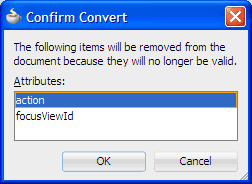
- Click OK twice. When prompted, click OK to confirm the conversion.
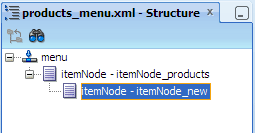
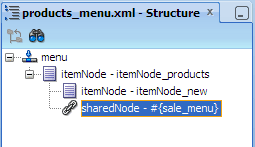
- In the Application Navigator, select products_menu.xml. In the Structure window, using itemNode_products as the parent node, drag and drop itemNode_new into the parent node.
-
In the Structure window of
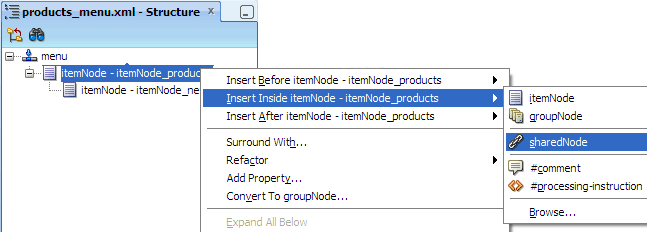
products_menu.xml, right-click the parent node, itemNode - itemNode_products, and choose Insert Inside itemNode > sharedNode.
- In the Insert sharedNode dialog, click the
 dropdown menu and choose Expression Builder.

-
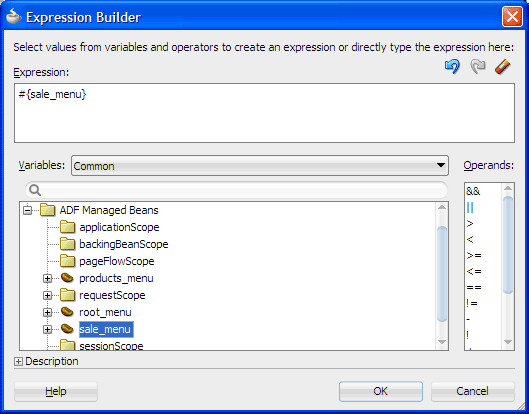
Expand ADF Managed Beans, then select sale_menu.
The EL expression#{sale_menu}is populated in the Expression box.
-
Click OK twice.
- In the Application Navigator, select root_menu.xml. In the Structure window, drag and drop only itemNode_shop into the parent node itemNode_home.
You do not need to moveitemNode_helpanditemNode_preferencesbecause they are global nodes on the same level asitemNode_home.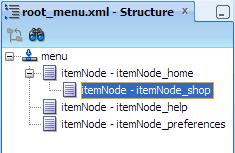
-
In the Structure window, right-click the parent node, itemNode_home, and choose Insert Inside itemNode > sharedNode. In the ref field, enter the EL expression
#{products_menu}, which references the managed bean name of the Products menu that is to appear on the home page. Click OK.
- In the Structure window of
root_menu.xml, drag sharedNode - #(products_menu} to position it before itemNode_shop.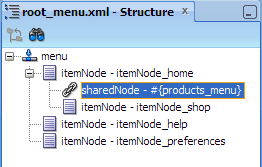
- Click
 Save All to save your work.
In the page hierarchy, Sale is identified as a menu node, so itemNode_sale becomes the
parent node when grouping child items under a parent in
sale_menu.xml.
A
groupNode has a mandatory idref attribute that must reference the id of a child itemNode or
another groupNode.
Unlike the
itemNode element, a groupNode element does not have the action
and focusViewId attributes.
You can enter an EL expression directly into the ref field or use the Expression Builder to create one. The EL expression must
reference the managed bean name of a submenu.
When you insert a shared node, JDeveloper adds the
sharedNode element into the ADF menu metadata source file.
Step 5: Create an ADF Page Template
-
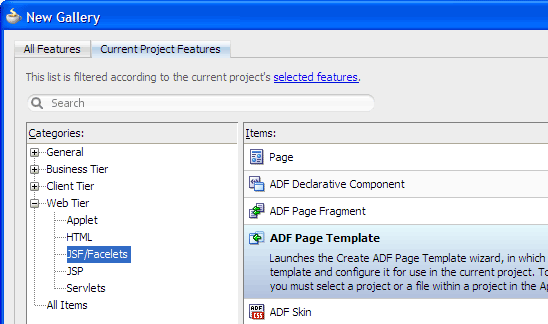
In the Application Navigator, right-click the ViewController project and
choose New > Web Tier > JSF/Facelets > ADF Page Template, then click OK.
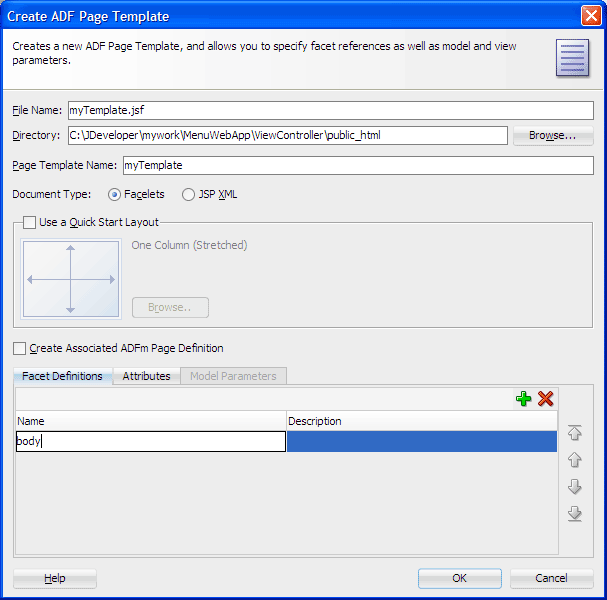
- In the Create ADF Page Template dialog, enter
myTemplate.jsfin the File Name field.
- Confirm that Facelets is selected as the document type, and Use a Quick Start Layout is not selected.
- With the Facet Definitions tab in front,
click
 to add a facetRef.
Enter
 bodyin the Name field, then click OK.
-
At the top of the editor window, click the document tab myTemplate.jsf to make sure the visual editor is in focus.
-
In the Component Palette, ADF Faces page, Layout panel,
drag
 Panel Stretch Layout
and drop it on the blank page in the visual editor.
-
In the Layout panel of the palette, from the Interactive Containers and Headers section, drag
 Panel Header and drop it on the top
facet of the panel stretch layout you just added.
When you drag the component to the facet, you should see a target rectangle with the name Facet top on the page; this means the component you are dragging will be inserted inside that target.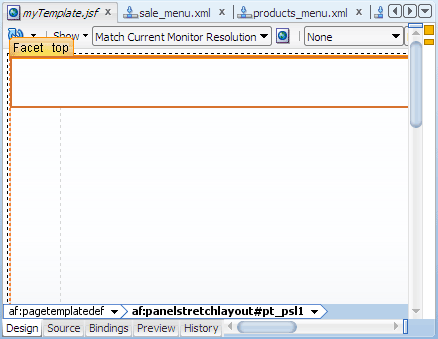
-
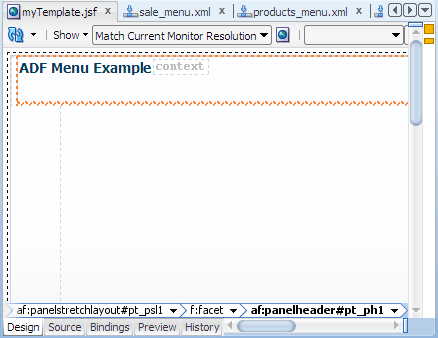
In the Property Inspector, Common section, change
the Text attribute value to
ADF Menu Example, and press Enter.
- Click
 Save All to save your work.
The visual editor should look similar to this:
If following along with the example, at this point there are no JSF pages in the Application Navigator.
Step 6: Add and Bind Navigation Pane Components
You will insert three Navigation Pane components to create three
levels of navigation items: one level of global buttons and two levels
of tabs.-
In the editor window, click the document tab myTemplate.jsf to make sure the template
page is in focus. If necessary, click the Design tab at the bottom to use the visual editor.
-
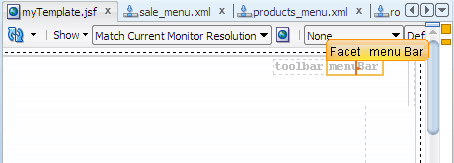
In the Component Palette, Layout panel,
Interactive Containers and Headers section, drag and drop
 Navigation Pane
into the menuBar facet of the panel header in the visual editor.
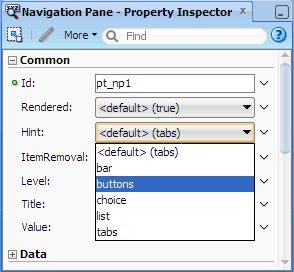
- In the Property Inspector, Common section, choose buttons
from the Hint dropdown list.
-
Confirm that
0is in the Level field.
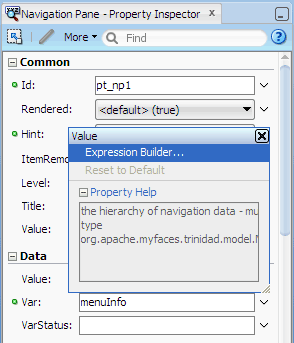
- Expand the Data section. In the Var field,
enter
menuInfo. Then choose Expression Builder from the dropdown
menu next to the Value field.
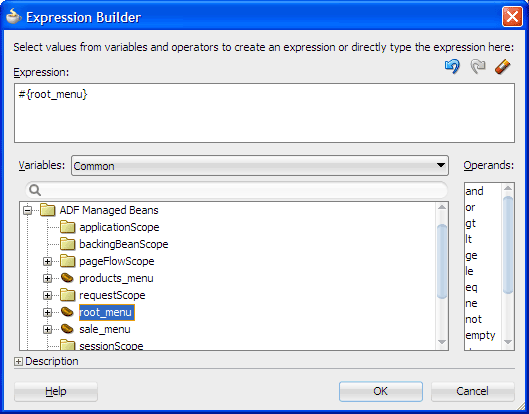
- Expand ADF Managed Beans and select root_menu.
Then click OK.
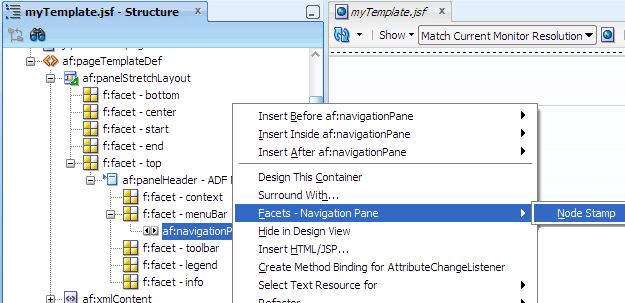
- In the Structure window, right-click af:navigationPane and
choose Facets - Navigation Pane > Node Stamp from the context menu.
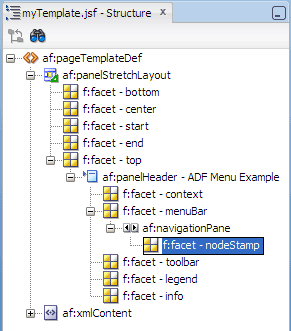
- In the Component Palette, Layout panel,
Interactive Containers and Headers section, drag and
drop
 Navigation Item
into the nodeStamp facet.
-
In the Property Inspector of Navigation Item, Common section, enter the following attribute values:
Attribute Value Text #{menuInfo.label}Destination #{menuInfo.destination}Action #{menuInfo.doAction} - In the Component Palette, Layout panel, drag and drop
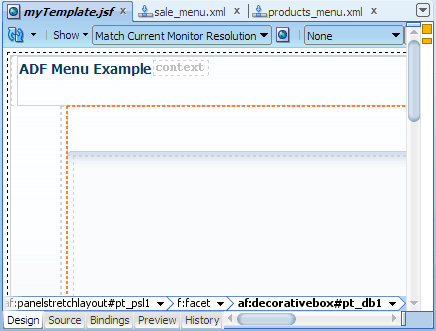
 Decorative Box
into the center facet (of the panel stretch layout) in the visual editor.
-
In the Component Palette, Layout panel, Interactive Containers and Headers section, drag and drop
 Navigation Pane into the top facet of the decorative box you just added.
-
In the Property Inspector of Navigation Pane, choose or enter the following attribute values:
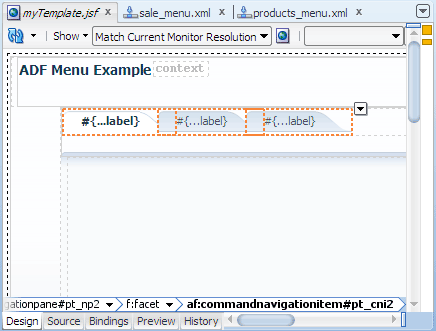
Section Attribute Value Common Hint tabs Level 1Data Value #{root_menu}Var menuInfo - Repeat steps 7 through 9 to insert a Navigation Item component into the nodeStamp facet of Navigation Pane, and bind the component to the menu model.
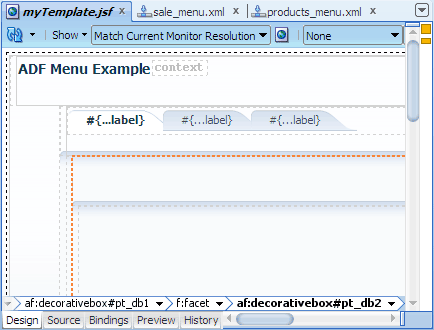
The visual editor looks similar to this after binding the Navigation Item component.
- In the Component Palette, Layout panel, drag and
drop
 Decorative Box into the center facet (of the first decorative box) on the page in the visual editor.
-
In the Component Palette, Layout panel, Interactive Containers and Headers section, drag and drop
 Navigation Pane
into the top facet of the decorative box you just added.
- In the Property Inspector, choose or enter the following attribute values:
Section Attribute Value Common Hint tabs Level 2Data Value #{root_menu}Var menuInfo - Repeat steps 7 through 9 to insert a Navigation Item component into
the nodeStamp facet of Navigation Pane, and bind the
component to the menu model.
- Click
 Save All to save your work.
You have added three Navigation Pane components, one for level 0 buttons, one for level 1 tabs, and one for level 2 tabs. All three components are bound to the same ADF menu model.
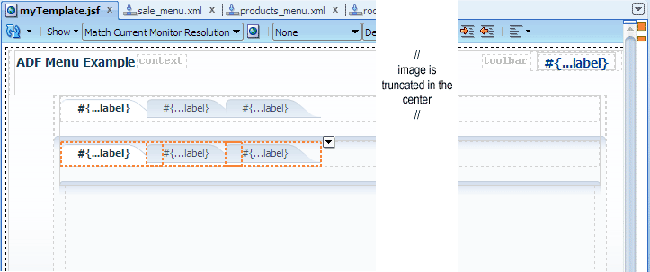
The Navigation Pane component, when bound to an ADF menu model, is used to create the menu navigation items for one level in
a page hierarchy.
As one Navigation Pane component is used to create the navigation items for one level in a page hierarchy, you must
set the
level attribute to specify the level to use on each component.
The Navigation Pane component can accept a series of Command
Navigation Item components as children, with each Command Navigation
Item component representing one menu item.
By binding Navigation Pane to the ADF menu model and using the
nodeStamp facet to stamp out command navigation items,
practically the same code can be used for Navigation Pane components at any menu level.
Step 7: Add and Bind the Bread Crumbs Component
You will insert a Bread Crumbs component to create a path of links from the current page back to the home page. -
In the editor window, click the document tab myTemplate.jsf to make sure the
template page is in focus. If necessary, click the Design tab at the bottom to use the visual editor.
-
In the Component Palette, Layout panel,
drag and drop
 Decorative Box
into the center facet on the page in the visual editor.
- In the Component Palette, General Controls panel, Location section,
drag and drop
 Bread Crumbs
into the top facet of the decorative box you just added.
- In the Property Inspector, Data section, enter
#{root_menu}in the Value field. Then entermenuInfoin the Var field.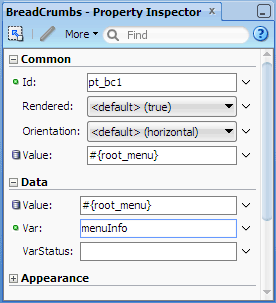
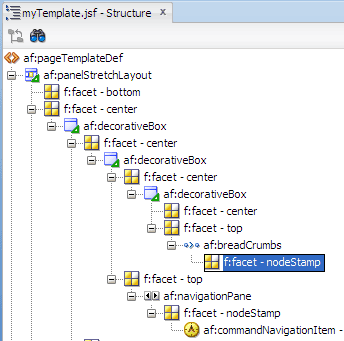
- In the Structure window, right-click af:breadcrumbs and
choose Facets - Bread Crumbs > Node Stamp from the context menu.
- In the Component Palette, Layout panel, Interactive Containers and Headers section, drag and
drop
 Navigation Item
into the nodeStamp facet.
- In the Property Inspector, Common section, enter the following attribute values:
Attribute Value Text #{menuInfo.label}Destination #{menuInfo.destination}Action #{menuInfo.doAction} - Click
 Save All to save your work.
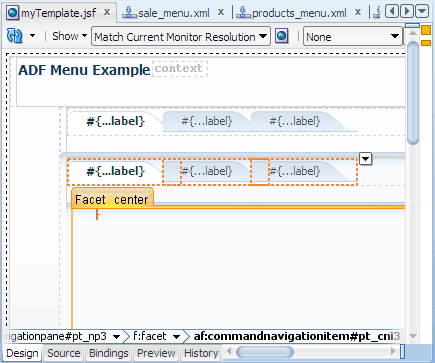
The visual editor should look similar to this:
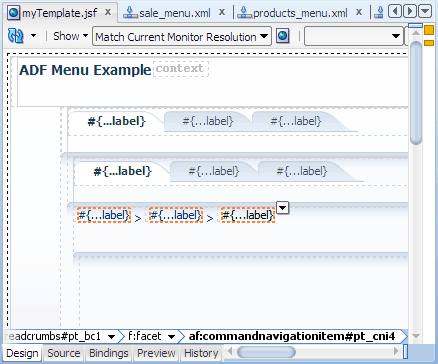
The Bread Crumbs component is used to create a path of links from the current page back to the root page.
Step 8: Complete the ADF Page Template
You will insert another Navigation Pane component to create the last level of navigation items.-
In the editor window, click the document tab myTemplate.jsf to make sure the
template page is in focus. If necessary, click the Design tab at the bottom to use the visual editor.
-
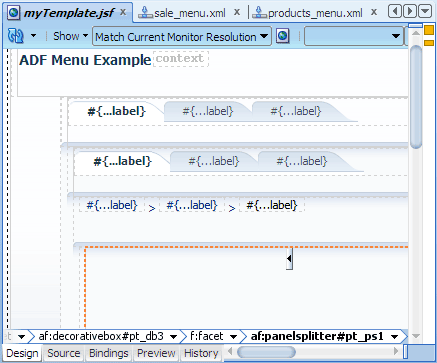
In the Component Palette, Layout panel, Interactive Containers and Headers section, drag and drop
 Panel Splitter
into the center facet on the page in the visual editor.
- Drag and drop
 Navigation Pane
into the first facet of the panel splitter you just added.
- In the Property Inspector, Common section, choose or enter the following attribute values:
Section Attribute Value Common Hint list Level 3Data Value #{root_menu}Var menuInfo - In the Structure window, right-click af:navigationPane and choose Facets - Navigation Pane > Node Stamp
from the context menu.
- In the Component Palette, Layout panel, Interactive Containers and Headers section, drag and
drop
 Navigation Item
into the nodeStamp facet.
 - In the Property Inspector, Common section, enter the following attribute values:
Attribute Value Text #{menuInfo.label}Destination #{menuInfo.destination}Action #{menuInfo.doAction} - In the Component Palette, Layout panel, Core Structure section, drag and drop
 FacetRef into the second facet of the panel splitter on the page.
- Choose body from the dropdown list, then click OK.

Thebodyfacet, defined in the page template definition, allows page authors to add their own content when they use the page template to create their pages.
Click Save All to save your work.
The visual editor should look similar to this: -
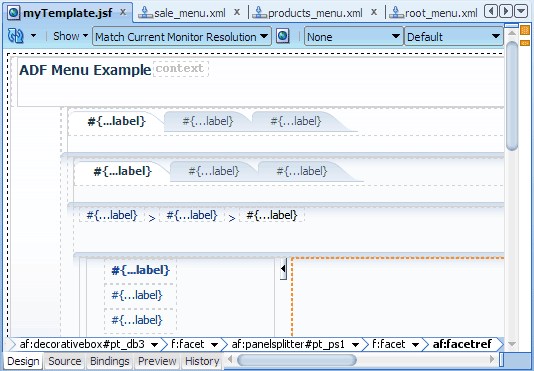
In this step you insert and bind a fourth Navigation Pane
component that will generate level 3 list navigation items in the
page hierarchy.
Step 9: Create the JSF Pages for the Views
-
In the editor window, click the adfc-config.xml tab to bring the unbounded
task flow diagram forward. (If not already open, double-click adfc-config.xml
in the Application Navigator to open the diagram.)
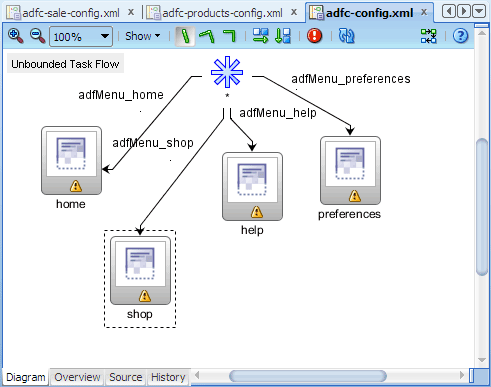
- On the diagram, double-click a view activity (for example, home) to open the Create JSF Page dialog.
- Select Facelets as the document type and accept the default file name (for example, home.jsf).
- On the Page Layout page, select Page Template and then
select myTemplate from the dropdown list.
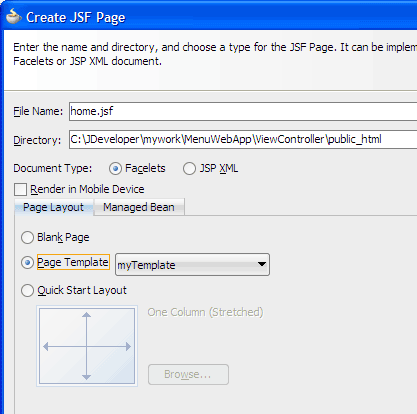
- Click Managed Bean and select Do Not Automatically Expose UI Components in a Managed Bean.
- Click OK.
JDeveloper displays the page in the visual editor. The navigation components from the page template should be visible on the page.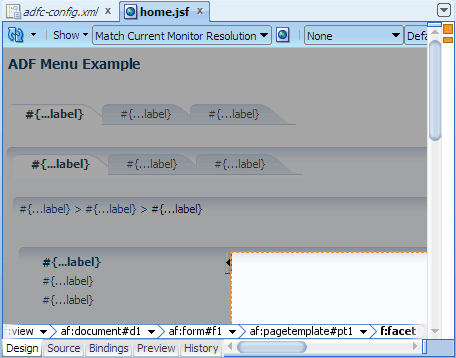
-
In the visual editor, add contents to the page by inserting ADF Faces components into the body facet.
- Repeat steps 2 through 7 for each remaining view activity on the diagram.
- Then repeat the procedure (steps 1 through 8) on the remaining unbounded task flows: adfc-products-config.xml and adfc-sale-config.xml.
- Click
 Save All to save your work.
- In the editor window, click the adfc-config.xml tab to bring the root unbounded task flow diagram forward.
Each each unbounded task flow diagram should now look similar to this, where yellow warning symbols no longer appear on the View activity icons.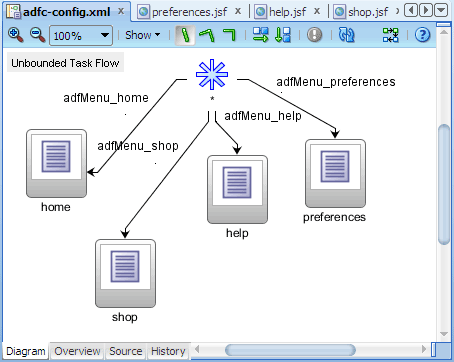
- On the diagram, right-click the home view activity icon and choose Run.
If the Create Default Domain dialog displays, enter the default password, for exampleweblogic1, in the Password and Confirm Password fields, then click OK.
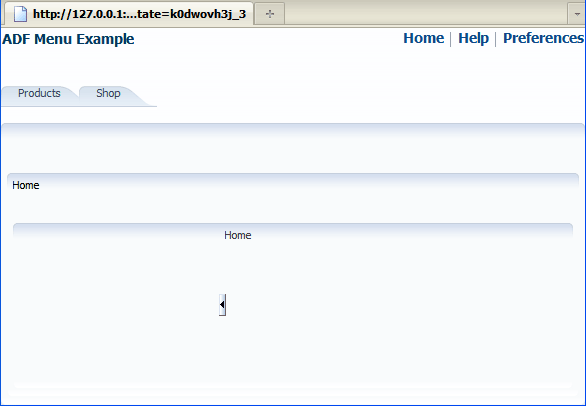
The Home page in the browser should look similar to this:
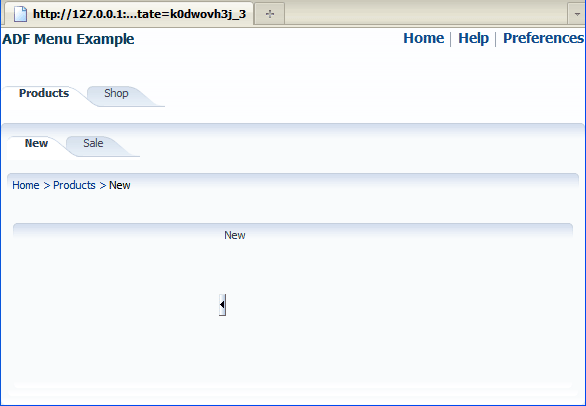
- Click the Products tab, then click New.
When you click a tab (and any navigation item under it), you should see bread crumb links above the split panes.
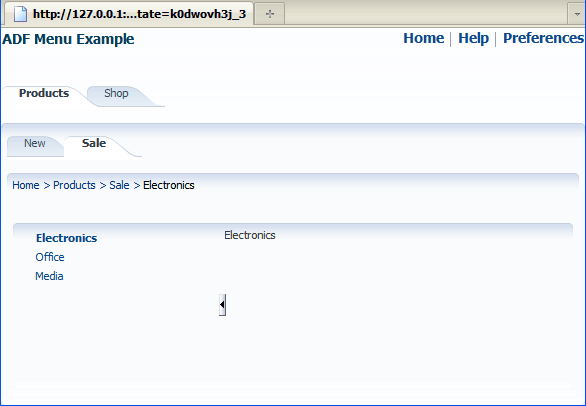
- Click Sale.
The application takes you directly to the Electronics page even though you created a Sale page for the Sale view activity.
- Click Help at the top right corner.
You should see Oracle's web page, not the Help page that you created.
If following along with the example, at this point there are no JSF pages in the Application Navigator.
In the Create JSF Page dialog, you can optionally specify
whether or not components on the page are exposed in a managed bean,
to allow programmatic manipulation of the UI components.
After creating a page based on the template, you can add contents specific to the page you are creating by inserting
appropriate ADF Faces components into the
body facet.
By default, JDeveloper automatically configures an integrated server named Integrated WebLogic Server that references
a user-specific instance of Oracle WebLogic Server bundled with the IDE.
The bread crumbs show the path of links from the current page back to the root or home page.
This is because the Sale ADF menu (
sale_menu.xml) uses a parent groupNode that references the
Electronics page through the idref attribute:
When both the
action and destination attributes on an itemNode are
specified (as shown in the following root_menu.xml code), destination has precedence over action.
Summary
In this tutorial you created a user interface for navigating an application page hierarchy. You learned how to:
- Use JDeveloper wizards and dialogs to create applications, task flows, page templates, and starter pages
- Define unbounded task flows for menus identified in a page hierarchy
- Use ADF Controller features in conjunction with XML Menu Model to build different levels of menus
- Bind Navigation Pane and Bread Crumbs components to the ADF menu model
- Use Integrated WebLogic Server to run a Fusion web application
Ref: http://docs.oracle.com/cd/E18941_01/tutorials/jdtut_11r2_43/jdtut_11r2_43.html


沒有留言:
張貼留言